Thunderbird and Spam
Dealing with spam in our daily email routines can be frustrating, but Thunderbird has some tools to make unwanted messages less of a headache. It takes time, training, and patience, but eventually you can emerge victorious over that junk mail. In this article we’ll explain how Thunderbird’s spam filter works, and how to tune it for the most effective results.
What Powers Thunderbird’s Spam Filter?
Thunderbird’s adaptive filter uses one of the oldest methods around — a Bayes algorithm — to help decide which messages should be marked as junk. But in order to work efficiently and reliably, it also needs a little help from you.
Thunderbird’s documentation and support community have always mentioned that the spam filter needs some human intervention, but I never understood why until researching how a Bayes algorithm works.
Why A Bayes Algorithm Needs Your Help
It’s helpful to think about Thunderbird’s spam filter as a sort of inbox detective, but you’re instrumental in training it and making it smarter. That’s because a Bayes algorithm calculates the odds that an email is spam based on the words it contains, and uses past experience to make an educated guess.
Here’s an example: you receive an email that contains the words “Urgent, act now to claim your free prize!” The algorithm checks to see how frequently those words appear in known spam messages compared to known good messages. If it detects those words (especially ones like “free” and “prize,”) are frequently in messages you’ve marked as spam, but not present in good messages, it will mark it as junk.
This is why it’s equally important to mark messages as “Not Junk.” Then, it learns to recognize “good” words that are common across non-spam emails. And for each message you mark, the probability that Thunderbird’s spam filter accurately identifies spam only increases.
Of course, it’s not perfect. A message you mark as junk might not consistently be marked as junk. A reliable, fail-safe way to ensure certain messages are marked as junk is to create filters manually.
Do you want to ensure important messages are never marked as junk? Try whitelisting.
Since junk mail patterns are always changing, it’s a good idea to regularly train Thunderbird. Without frequent training, it may not provide great results.
Junk Filter Settings
Now that we understand what powers Thunderbird’s junk filter, let’s look at how to manage the settings, and how to train Thunderbird for more consistent results.
Global Junk Settings
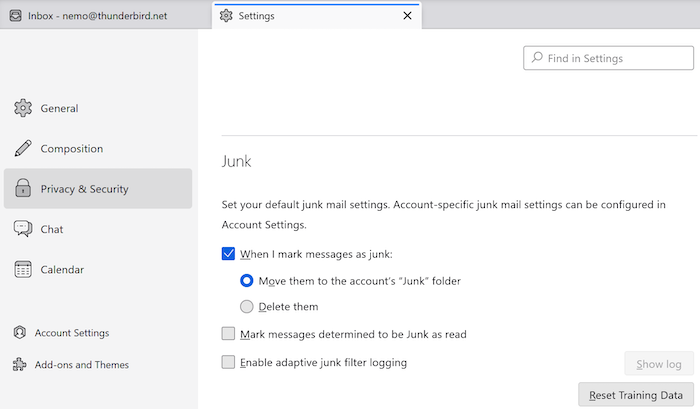
Junk filtering is enabled by default, but you can fine-tune what should happen to messages marked as junk using the global settings. These settings apply to all email accounts, though some can be overridden in the Per Account Settings.
- Click the menu button (≡) > Settings > Privacy & Security.
- Scroll down to Junk and adjust the settings to your preference.

Per Account Settings
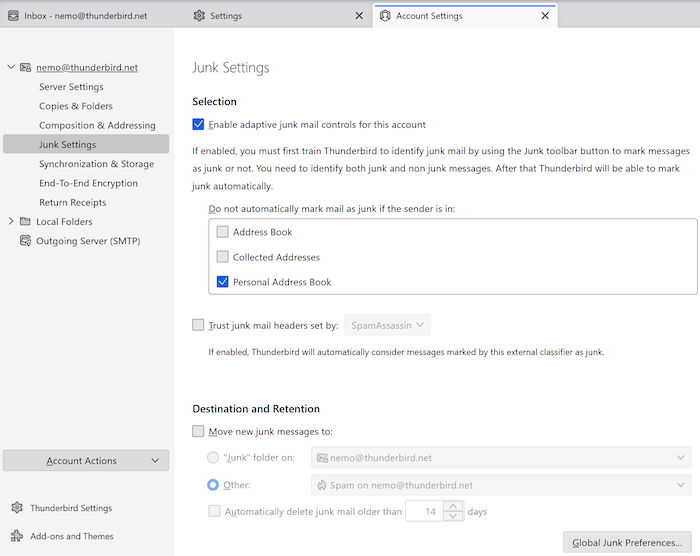
The junk settings for each of your email accounts will override similar settings in the Global Settings.
- Click the menu button (≡) > Account Settings > Your email address > Junk Settings.

How to Turn Off Thunderbird’s Adaptive Filtering
To disable Thunderbird’s adaptive junk mail controls:
- Uncheck Enable adaptive junk mail controls for this account.
Whitelisting
Under Do not automatically mark mail as junk if the sender is in, you can select address books to use as a whitelist. Senders whose email addresses are in a whitelisted address book won’t be automatically marked as junk. However, you can still manually mark a message from a whitelisted sender as junk.
Enabling whitelisting is recommended to help ensure messages from people you care about are not marked as junk.
Training the Junk Filter
This part is important: for Thunderbird’s junk filter to be effective, you must train it to recognize both junk and non-junk messages. If you only do one or the other, the filter won’t be very effective.
It’s important to mark messages as junk before deleting them. Just deleting a message doesn’t train the filter.
Tell Thunderbird What IS Junk
There are several ways to mark messages as junk:
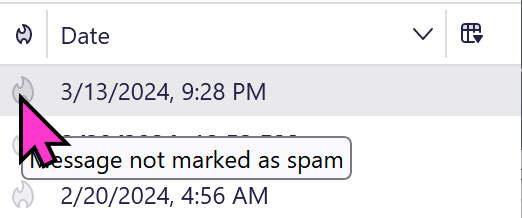
- Click on the junk icon in the Junk column of the Message List Pane:

- Click the Junk button on the Message Header Pane:

- Press J on your keyboard to mark one or more selected messages as junk.
Once you mark a message as junk, if you’ve configured your Global Junk Settings or Per Account Settings to move junk email to a different folder, the email will disappear from the Message List Pane. Don’t worry, the email has moved to the folder you’ve configured for junk mail.
Thunderbird’s junk filter is designed to learn from the training data you provide. Marking more messages as Junk or Not Junk will improve the accuracy of your junk filter by adding more training data.
Tell Thunderbird What is NOT Junk
Sometimes Thunderbird’s junk filter might mark good messages as junk. It’s important to tell the filter which messages are not junk, especially on a new installation of Thunderbird.
Note: Frequently (daily or weekly) check your Junk folder for good messages wrongly marked as junk and mark them as Not Junk. This will recover the good messages and improve the filter’s accuracy.
There are several ways to mark messages as Not Junk:
- Click the Not Junk button in the yellow junk notification below the message header in the Message List Pane:

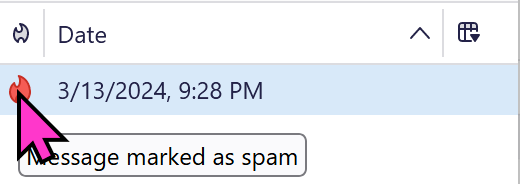
- Click the red junk icon in the Junk column of the Message List Pane to toggle the junk status of a message:

- Press Shift+J on your keyboard to mark one or more messages as Not Junk.
Once you unmark a message as junk, it will disappear from the current folder but will return to its original folder.
Repeated Training
Regularly train the filter by marking several good messages as not junk. This includes messages in your inbox and those filtered into other folders. Use the keyboard shortcut Shift+J for this, as the Not Junk button only appears for messages already marked as junk. Marking several messages per week will be sufficient, and you can select many messages to mark all at once.
Unfortunately, the user interface doesn’t indicate whether a message has already been marked as “not junk.”
Other Ways to Block Unwanted Messages
Thunderbird’s adaptive junk filter is not an absolute barrier against messages from specific addresses or types of messages. You can use stronger mechanisms to block unwanted messages:
Create Filters Manually
You can manually:
- Block some senders.
- Create filters to block messages based on subject or other criteria.
Use an External Filter Service
You can also use an external filter service to help classify email and block junk:
- Click the menu button (≡) > Account Settings > Your Account > Junk Settings.
- Enable the Trust junk mail headers set by option.
- Choose an external filter service from the drop-down menu.
2 responses
Ben wrote on
Monica Ayhens-Madon wrote on
Comments are closed.